Naturally Clear: Herbal Remedies For Acne
- 13 Apr - 19 Apr, 2024
With a new season, you can always expect there to be new beauty trends. At the moment, we can’t help but notice that the halo eye makeup trend is popping up everywhere. Also known as “spotlight eyes,” this new statement eye makeup look is all about strategically placing eye shadow around your eyes to fake a bigger, brighter gaze.
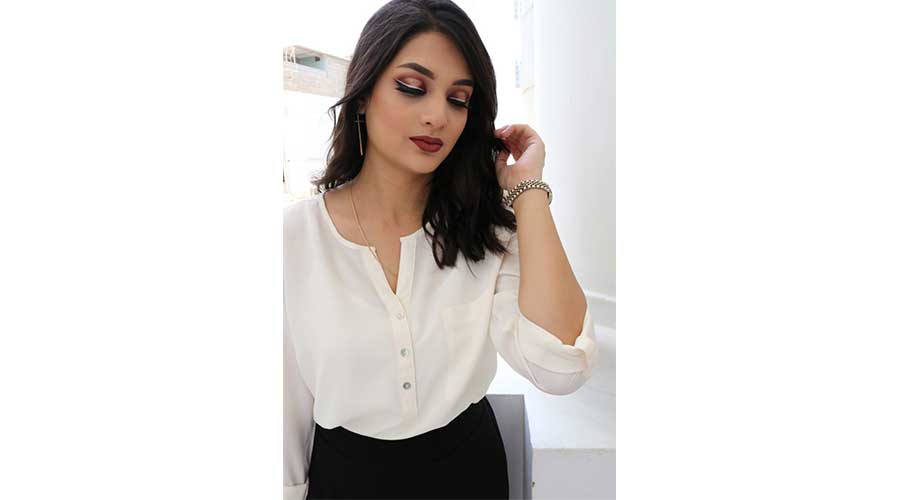
To help you learn how to rock this glow-y beauty trend, MAG got in touch with beauty blogger and MUA, Dania Hafeez, a makeup artist certified from international MUA, Ilaha Hajiyeva’s makeup masterclass. Read on as Dania walks you through the halo eye makeup tutorial along with the complete look.

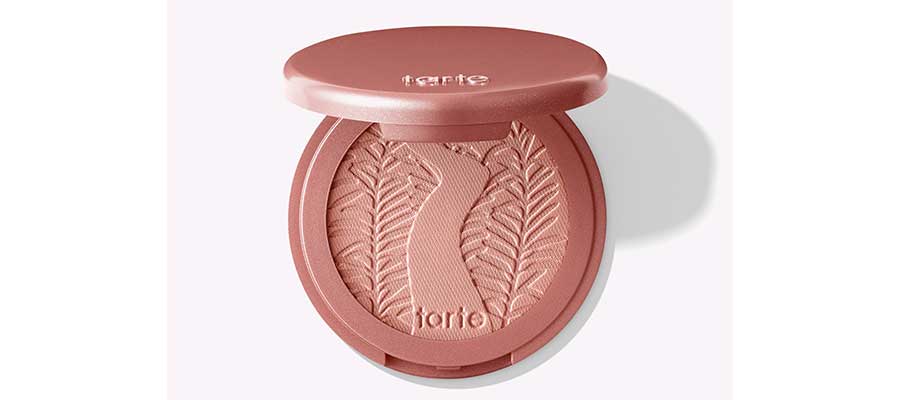
For skin prep, I have used The Body Shop Vitamin C Glow Boosting Moisturiser and Smashbox Photo Finish Primer. For a soft base, I have used Givenchy Teint Couture Everwear in the shade Y300. To mask dark circles, and other small blemishes visible on the skin, I have used Tarte Shape Tape Concealer in the shade Light Sand. To help set foundation, control shine, and smooth out blemishes and fine lines, I've used the Fenty Beauty's Pro Filt'r Instant Retouch Setting Powder in the shade Butter. To define my features, I have used Luscious Face Contour Kit. To add a flush of colour to the cheeks, I have used Tarte Amazonian Clay 12-Hour Blush. For highlighting my cheek bones, bridge of my nose and cupid's bow, I have used Becca Champagne Pop.
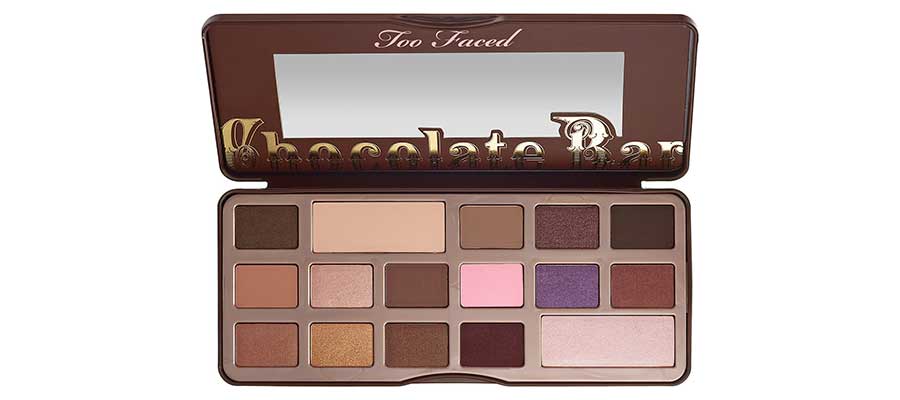
To create halo eyes, I have used Too Faced Chocolate Bar Eyeshadow Palette. Below is a step by step guide to creating this chic look.
Step 1: Blend out your crease
Since the main focus of a halo eye shadow look is your lids, you don’t want your crease to cause a distraction. Stick with a light neutral colour in your crease.

Step 2: Apply your corner colours
Depending on the colour scheme you choose to go with, swipe a medium shade, onto the inner and outer thirds of your upper and lower lids.

Step 3: Add a bit more depth to the corners
To give your look more dimension, use a small, tapered blending brush to dab a small amount of a darker, complementary colour into your crease.
Step 4: Brighten up your center lids
To give the appearance of rounder eyes, you want to use a lighter, bright colour in the center of your upper and lower lids, sandwiched between the two darker sections of shadow. The focal point of this entire look is on that pop of brightness, so make sure to pick a colour that really shines.
Step 5: Highlight the inner corner
Using that same light shade, apply the slightest amount of highlight to the inner corners of your eyes to really brighten them up for a wide-awake effect.
Step 6: Get catty!
Continue with the glam factor and create a thin cat eye using Kryolan Aqua Cake Eyeliners in white and black.
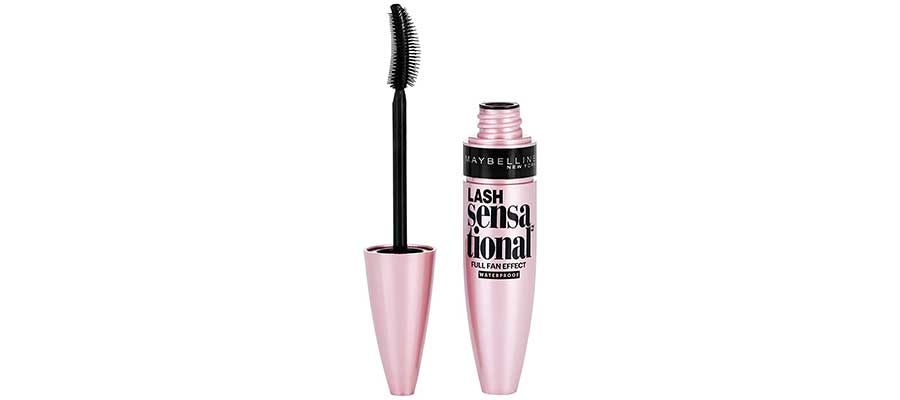
Step 7: Lush up your lashes
With a look this good, it would be a crime to not give your lashes some love too! Apply a few coats of Maybelline Lash Sensational Waterproof Mascara to give your lashes voluptuous volume and intense length.
To add colour and texture to my lips, I have used Anastasia Beverly Hills Liquid Lipstick in Dazed which is a moderately warm-toned, dark plum with a matte finish.


COMMENTS